Why do DNS leaks keep recurring? Chances are you didn’t get this step right
Many people run a DNS leak test and see that everything looks fine, only to discover DNS leaks again when they test a little later. Why does this happen?
The problem usually isn't a lack of technical knowledge. Instead, people often overlook one key fact: DNS leaks are rarely caused by a single issue. They are often the result of system settings, network environments, and software conflicts combining to create a problem that keeps reappearing.
Today, we'll explain why DNS leaks keep coming back, which settings are commonly misconfigured, and how to use DNS leak testing to systematically identify and eliminate the issue.

1. Why Do DNS Leaks Keep Coming Back?
The first reason is automatic DNS reassignment by the operating system. For example, Windows or macOS may automatically revert to your ISP's DNS servers after a network switch or Wi-Fi reconnection, overriding your manual DNS settings.
The second reason is incomplete proxy client configuration. Some tools only route traffic through the proxy but do not force DNS requests through it. As a result, your traffic appears protected while DNS queries are still exposed.
Another commonly overlooked factor is multi-network-adapter conflicts. Running both Wi-Fi and Ethernet simultaneously, or using virtual adapters and gaming accelerators, can cause DNS traffic to take the wrong route.
That's why you may notice a pattern: it's not that the problem was never fixed—it's that the system quietly changed the settings back.
2. DNS Leak Detection: Don't Trust a Single Test
Many users run a DNS leak detection test once, see a secure result, and assume everything is fine. However, DNS issues are particularly deceptive because a single test is often not enough.
A more reliable approach is to test under three different conditions:
First, test before connecting to a proxy to determine which DNS server your system uses by default.
Second, perform a DNS leak test after enabling the proxy and verify whether the DNS server has changed to the encrypted provider's DNS.
Third, switch networks or reconnect to Wi-Fi and run another test to confirm that the settings remain intact.
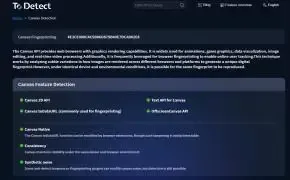
Platforms like ToDetect DNS Leak Detection are useful for this kind of continuous testing because they help you monitor DNS changes over time instead of simply providing a one-time result.
If you test only once, it's easy to fall into a false sense of security.
3. DNS Leak Test: How to Tell If You're Truly Secure
Many people focus only on whether the result says "Leak Detected" or "No Leak Detected." In reality, the DNS route is what matters most. Under normal circumstances, DNS requests should be routed through your proxy or an encrypted DNS channel such as DoH (DNS over HTTPS) or DoT (DNS over TLS).
If the DNS leak test shows your local ISP's DNS servers, there's a strong chance that DNS leakage is occurring.
There is also a more subtle issue: even if the DNS server is not your ISP's, an unusual geographic location may indicate misconfiguration. For example, if you're in one country but your DNS queries are being resolved by random servers in another region, your DNS setup may be inconsistent.
4. DNS Leak Troubleshooting Priority Checklist (Practical Guide)
| Troubleshooting Layer | Common Symptoms | Possible Cause | How to Check | Recommended Fix |
|---|---|---|---|---|
| Layer 1: System DNS | DNS test shows ISP IP addresses | Automatic system DNS assignment | Check network adapter DNS settings | Disable automatic DNS and manually configure encrypted DNS |
| Layer 2: Proxy Channel | Proxy connected but DNS unchanged | Proxy does not handle DNS requests | Compare DNS test results before and after enabling proxy | Enable DNS Leak Protection in the proxy client |
| Layer 3: Browser DNS | Proxy works but browser leaks DNS | Browser uses independent DNS (DoH conflict) | Check Chrome/Edge Secure DNS settings | Disable custom browser DNS settings |
| Layer 4: Network Switching | Leak reappears after switching Wi-Fi | Network reconnection resets DNS settings | Run another DNS leak test after reconnecting | Use fixed DNS settings and lock network configuration |
| Layer 5: Software Conflicts | DNS changes randomly | Conflicts between accelerators, proxies, and virtual adapters | Disable networking-related software one by one and test | Use only one proxy solution |
| Layer 6: System Updates | Previously secure setup suddenly leaks | System update resets networking stack | Run a DNS leak test immediately after updates | Reconfigure DNS and proxy settings after updates |
5. DNS Leak Fix: The Critical Step 90% of People Miss
Most online guides recommend three things: changing your DNS server, enabling a proxy, and clearing your DNS cache. However, the most commonly overlooked step is disabling automatic DNS assignment and forcing all requests through encrypted DNS.
Many people change their DNS addresses but leave "Automatic DNS" enabled. As soon as the network reconnects, the operating system restores the original settings.
The correct approach is to disable automatic DNS configuration, enable DNS Leak Protection in your proxy client, use DoH or DoT whenever possible, and remove unnecessary virtual adapters or leftover proxy configurations. Relying solely on a proxy is not enough—encrypted DNS is equally important.
6. Why Does the Problem Return Even After Fixing It?
If you've already fixed DNS leaks but the issue keeps returning, one of these hidden factors is usually responsible:
First, the proxy's reconnection mechanism may temporarily expose DNS traffic during disconnects.
Second, your browser may be using its own DNS service, such as Chrome's Secure DNS feature.
Third, a system update may have reset your network configuration.
Fourth, synchronization between multiple devices may introduce configuration conflicts.
The common characteristic of these issues is that they don't appear immediately—they silently restore DNS leaks when you're not paying attention.
7. How to Build Long-Term Protection Instead of Repeatedly Fixing the Problem
The key to preventing recurring DNS leaks is not fixing them once—it's maintaining a stable configuration.
First, permanently configure a trusted encrypted DNS provider instead of relying on automatic DNS assignment.
Second, enable strict DNS protection within your proxy software and perform regular DNS leak checks, such as weekly tests using tools like ToDetect.
Third, test your setup under different network environments, including home, office, and public Wi-Fi networks, to ensure network switching does not break your configuration.
Many people overlook an important reality: DNS leaks are not one-time issues. They are often triggered by changes in the network environment.
Conclusion
After fixing DNS leaks, many users stop monitoring their configuration. Then a system update, network switch, or software conflict silently reintroduces the problem.
The most effective strategy is not a one-time fix, but a long-term protection plan: maintain consistent DNS rules, ensure all DNS traffic is handled by your proxy, and regularly use ToDetect for DNS leak testing to verify that your setup remains secure.
If you make "Test → Fix → Verify" a routine habit, DNS leaks are far less likely to become a recurring problem.