How to Prevent DNS Leaks — 2026 Detection & Fix Guide (Router + Computer + Mobile)
If DNS leaks are not handled properly, even if you use a VPN or encrypted network, your browsing records may still be visible to platforms or third parties.
In other words, you may think you’re “invisible,” but in reality you’re browsing under your real identity. This situation is very common today—not just a mistake beginners make.
In this guide, we’ll walk you through step by step: from routers and computers to mobile phones, how to completely fix DNS leaks, along with practical tools to help you detect privacy vulnerabilities.

1. What is a DNS Leak? Why It Matters
DNS acts as a “translator” that converts domain names into IP addresses. Normally, if you're using a proxy or VPN, this translation should also go through an encrypted channel.
However, many devices still use the default DNS from local ISPs, which leads to your visited domains being exposed—this is what we call a DNS leak.
Common risks include:
• Your browsing history being logged by your ISP
• Targeted ads or even censorship
• IP tools appear connected, but you're actually exposed
2. First Step: DNS Leak Test
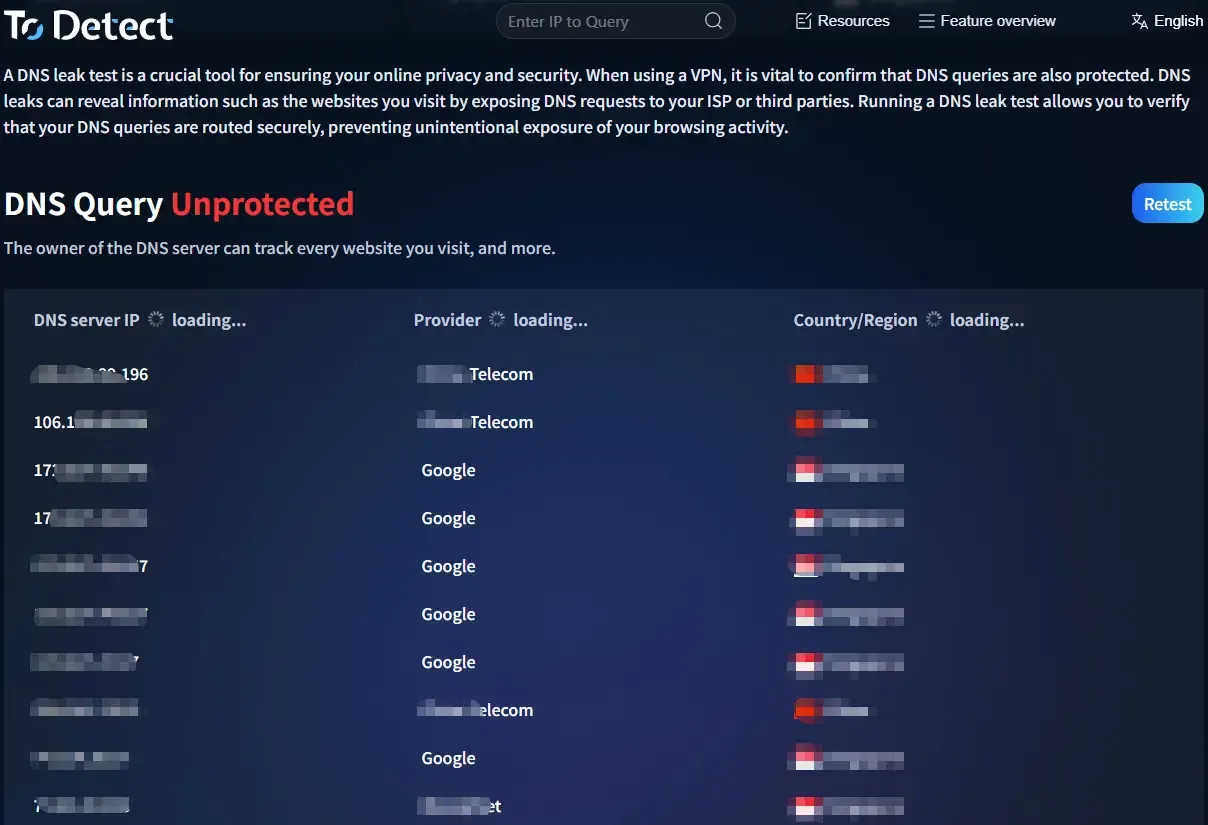
Before configuring anything, it's recommended to run a DNS leak test to check your current status. You can do it as follows:
• Open your browser and visit a DNS testing site (e.g. https://www.todetect.net/)
• Run a “Standard Test” or “Extended Test”
• Check the returned DNS server locations
If you're located in China but the result shows local ISP DNS (such as China Telecom or China Mobile), then a leak is very likely.
👉 Advanced tip: also use the ToDetect fingerprint checker for a full scan
It can not only detect DNS leaks but also check whether your IP, WebRTC, Canvas, and other elements are exposed—helping you identify privacy risks comprehensively.
3. Router-Level DNS Leak Protection (Most Important)
Method 1: Manually Set Secure DNS
Log in to your router admin panel (usually 192.168.1.1), find the DNS settings, and enter:
• Cloudflare: 1.1.1.1 / 1.0.0.1
• Google: 8.8.8.8 / 8.8.4.4
👉 Note: Standard DNS can still be intercepted—consider upgrading to:
Method 2: Enable DoH / DoT (Encrypted DNS)
If your router supports:
• DNS over HTTPS (DoH)
• DNS over TLS (DoT)
• Enable them and choose providers like Cloudflare DoH or NextDNS (supports custom rules)
Method 3: Use OpenWRT / Merlin Firmware
Use SmartDNS or AdGuard Home to force all devices to use specified DNS, preventing fallback to ISP DNS.
4. Prevent DNS Leaks on Computers (Windows / Mac)
Windows Setup
Open “Network & Internet Settings” → “Change Adapter Options” → select current network → Properties → IPv4
Manually set DNS: 1.1.1.1 / 1.0.0.1
👉 Recommended: Enable in Browser (Chrome/Edge)
Settings → Privacy & Security → Security → Enable “Secure DNS” and choose Cloudflare or custom DoH
Mac Setup
• System Settings → Network → WiFi → Details → DNS
• Add: 1.1.1.1 / 8.8.8.8
• Also enable DoH in your browser.
5. Prevent DNS Leaks on Mobile (iOS / Android)
iPhone (iOS)
Method 1: Configuration Profile (Recommended)
Use the official Cloudflare 1.1.1.1 app or install a DoH profile.
Method 2: Manual WiFi Setup
Go to WiFi → Configure DNS → Manual → enter 1.1.1.1
Android
• Simplest method: Settings → Network → Private DNS
• Enter: dns.cloudflare.com
• This enables DoT (encrypted DNS) and works very well.
6. Additional Browser-Level Protection
Many people overlook browsers, but they can also cause DNS leaks or privacy exposure. Do these three things:
• Enable Secure DNS (DoH)
• Disable WebRTC (to prevent IP leaks)
• Use privacy extensions (e.g., uBlock Origin)
7. Don’t Ignore: Browser Fingerprinting
Even if DNS is not leaking, you can still be identified because browser fingerprinting acts as another “invisible identity.”
It is recommended to use the ToDetect fingerprint tool to check:
• Whether your fingerprint is unique
• Whether you are easily trackable
• Whether there are privacy risks
If the score is poor, you may need to use an anti-fingerprint browser or adjust your privacy settings.
8. A Complete DNS Leak Protection Setup (Simple Version)
If you don’t want to overcomplicate things, just use this setup:
• Router: Cloudflare DNS + DoH
• Computer/Mobile: Enable system-level encrypted DNS
• Browser: Enable Secure DNS + Disable WebRTC
• Regular checks: DNS leak test + ToDetect fingerprint tool
Conclusion
In most cases, DNS leaks happen simply because default settings were never changed. These small details determine whether your internet usage is truly secure.
If you only ran a DNS leak test once and assumed everything is fine, it’s recommended to also use the ToDetect fingerprint tool for a more comprehensive check.
Don’t aim for a perfect setup all at once. First secure your router, devices, and browser—then optimize step by step.
 AD
AD