How to Fix DNS Leaks in Chrome Browser: 2026 Guide to DNS Leak Protection & Security Settings
Many people use the Chrome browser every day but overlook one “hidden yet critical” issue — DNS leaks.
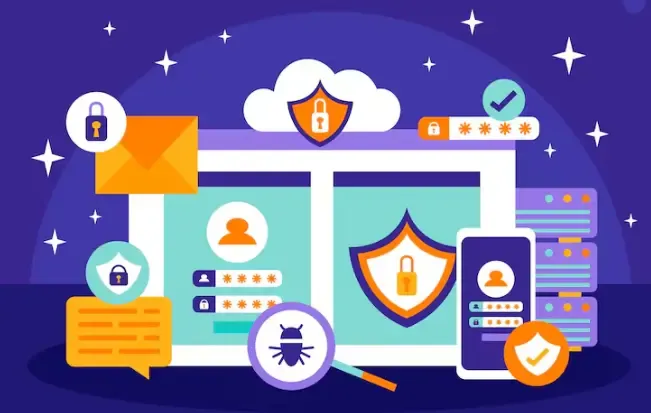
DNS leaks are not something you can notice with your eyes, and there will be no pop-up warning. They are usually exposed only through methods such as browser fingerprint detection or IP analysis.
Next, let’s walk through how to fix DNS leaks in Chrome step by step — from detection to complete repair.

1. What Is a DNS Leak and Why Is It Important?
DNS works like the “phonebook of the internet.” When you visit a website or platform, the system first uses DNS to resolve the real IP address.
A DNS leak happens when you are using a proxy or VPN, but your DNS requests are still exposed directly to your local ISP or third-party servers.
This may result in your actual browsing activity being logged, your “anonymous” setup becoming ineffective, and your region being accurately identified under certain network environments.
2. How to Perform a DNS Leak Test ? (A Very Important Step)
Before fixing anything, you should first run a complete DNS leak test or DNS leak check. Otherwise, you won’t know where the problem is.
Common Detection Methods:
• Use an online DNS testing website (it automatically checks your DNS resolution path)
• Check whether the DNS server belongs to your local ISP
• Verify whether IPv6 leaks exist
Here we recommend ToDetect. It can not only perform DNS leak detection but also browser fingerprint testing, IP exposure analysis, and WebRTC leak checks.
Browser fingerprint detection in particular helps determine whether you are being identified through multiple tracking techniques, making it more comprehensive than DNS testing alone.
3. Why Is Chrome Prone to DNS Leaks?
Many people assume Chrome is a secure browser, but in reality, certain settings can make DNS leaks more likely.
1. DNS Uses the System Channel by Default
Chrome uses the system DNS by default. If your system DNS is not encrypted, leaks can easily occur.
2. WebRTC Mechanism Issues
WebRTC is designed for video and voice communication, but it can expose your local IP address and sometimes indirectly cause DNS leaks.
3. Incomplete Proxy Configuration
Some proxy tools encrypt traffic only but do not take over DNS requests.
4. DNS Leak Risk Levels and Recommended Solutions
| Risk Scenario | Detection Result Features (DNS Leak Test) | Common Cause | Risk Level | Recommended Solution |
|---|---|---|---|---|
| All DNS requests come from local ISP | Shows ISP DNS such as China Telecom / China Unicom / China Mobile | Proxy DNS takeover is not enabled | High Risk | Enable proxy DNS protection + change system DNS |
| Part local DNS + part proxy DNS | Mixed DNS resolution results | Incomplete proxy configuration or split tunneling | Medium-High Risk | Check proxy settings and disable split tunneling |
| All DNS requests come from proxy or public DNS | Displays 1.1.1.1 / 8.8.8.8, etc. | DNS traffic is encrypted and fully handled | Low Risk | Keep the current configuration |
| DNS is normal but IP is still exposed | No DNS issue but IP leakage exists | WebRTC or proxy configuration problem | Medium Risk | Focus on browser fingerprint testing |
| Both DNS and fingerprint are abnormal | Multiple privacy tests failed | Browser environment is not isolated | High Risk | Use privacy mode + fingerprint protection extensions |
5. Latest Chrome DNS Leak Fix Methods in 2026 (Important)
It is recommended to follow these methods step by step in order.
1. Enable Chrome Secure DNS (DoH)
• In Chrome, go to: Settings → Privacy and Security → Security → Use Secure DNS
• Then choose your current provider or a custom provider (recommended: Cloudflare / Google DNS)
2. Manually Change the System DNS (Very Important)
It is recommended to switch directly to encrypted or stable DNS services, for example:
• Cloudflare: 1.1.1.1
• Google DNS: 8.8.8.8
This can reduce interference from your local ISP’s DNS.
3. Fix WebRTC Leaks
Although Chrome cannot completely disable WebRTC, you can use browser extensions to block WebRTC IP leaks.
You can also disable the “local IP exposure” feature in privacy extensions. This step is critical for users who fail DNS leak tests.
4. Use Trusted Proxy Tools and Enable “DNS Protection”
Not all proxy tools can prevent DNS leaks. Choose tools that support DNS Leak Protection and Kill Switch features.
Alternatively, use global proxy mode. Otherwise, even with a proxy enabled, DNS leak tests may still fail.
5. Clear Browser Cache and Reset Network Settings
Clear Chrome cache, reset network settings (Windows / macOS), and restart your router. Don’t underestimate this step — many “mysterious DNS leak problems” are solved this way.
6. DNS Leak Detection + Browser Fingerprint Testing Should Be Done Together
Many users only perform DNS leak tests, but that alone is not enough.
• Many platforms combine IP addresses, DNS resolution paths, browser fingerprints, time zones, and font information to identify users.
• Therefore, after fixing DNS issues, it is recommended to perform a complete DNS leak test + browser fingerprint test again.
Especially with tools like ToDetect, you can view your overall privacy exposure in one place, making it much more intuitive than a single test.
7. DNS Leak and Privacy Security FAQ
1. Why Do DNS Leaks Still Happen Even When Using a Proxy?
It’s not that the proxy is useless — the issue is that the proxy tool did not take over DNS requests, so DNS queries are still routed through your local ISP.
The solution is to enable “DNS Leak Protection” in your proxy or VPN tool.
2. Why Is My Privacy Still Unsafe Even Though the DNS Leak Test Looks Normal?
DNS leak testing is only one type of check. Many platforms also identify users through browser fingerprints, IP addresses, and WebRTC information.
It is recommended to use tools like ToDetect for a complete privacy inspection.
3. Why Does Chrome Still Report DNS Leaks Even After Enabling Secure DNS?
This situation is usually caused by:
• The system DNS is still set to the ISP default
• The proxy tool is not handling DNS traffic
• IPv6 requests bypassing protection
To completely solve the issue, you need to adjust both the system DNS and proxy tool settings — changing only the browser is not enough.
4. Do Ordinary Users Really Need DNS Leak Protection?
If you only watch videos or browse websites casually, you may not notice the impact. But for cross-border business or social media operations, DNS leak protection is very important.
It won’t make your browsing experience more complicated, but it can significantly reduce unnecessary privacy exposure risks.
Conclusion:
Many people think using a proxy solves everything, but true privacy security actually depends on a combination of browser settings, system DNS, and network environment.
Privacy security is not something that becomes permanently safe after one setup. It is an ongoing process. Running DNS leak tests regularly is far more important than most people realize.