Batch Import Proxies to Fingerprint Browser – One-Click Switch (2026 Guide)
Anyone managing social media matrices or multiple accounts will encounter a common challenge: how can you operate multiple account environments simultaneously in a way that is both fast and stable?
Nowadays, the combination of a fingerprint browser + proxy IP has become the standard setup. However, many people still don’t know how to batch import proxy IPs into a fingerprint browser, nor how to achieve multi-environment switching.
Next, let’s take the commonly used Bit Browser as an example and break down the complete process of “batch importing proxy IPs” and “one-click multi-environment switching,” so you can get started immediately.
1. Why must you use a fingerprint browser + proxy IP?
Platforms (such as Facebook, TikTok, Amazon, etc.) identify user devices through browser fingerprint detection.
• If you log into multiple accounts using a regular browser, it is easy to be identified as “one person operating multiple accounts,” which triggers risk control.
• This is where fingerprint browsers (such as Bit Browser) come in. They can create an independent environment for each account, essentially giving each account its own “virtual computer.”
However, having isolated environments alone is not enough. You also need proxy IPs to separate network identities. Otherwise, using the same IP for multiple accounts will still get flagged.
2. The importance of batch importing proxy IPs
Many people initially enter proxy IPs manually one by one. This works fine with a few accounts, but once the number grows (dozens or even hundreds), it becomes overwhelming.
This is why “batch importing proxy IPs” is critical. It allows you to:
• Import dozens or hundreds of proxies at once
• Quickly bind them to different browser environments
• Reduce human errors
• Improve overall efficiency
Especially for matrix account operations or account testing projects, this step can save a significant amount of time.
3. Batch importing proxy IPs into a fingerprint browser – Detailed steps
Let’s get straight to the practical steps. Using Bit Browser as an example, the process also applies to most fingerprint browsers.
1. Prepare the proxy IP format
Before importing, make sure your proxy format is standard. Common formats include:
IP:Port:Username:Password or http://username:password@IP:port
It is recommended to organize them into TXT or CSV files in advance for easier importing.
2. Access the proxy management interface
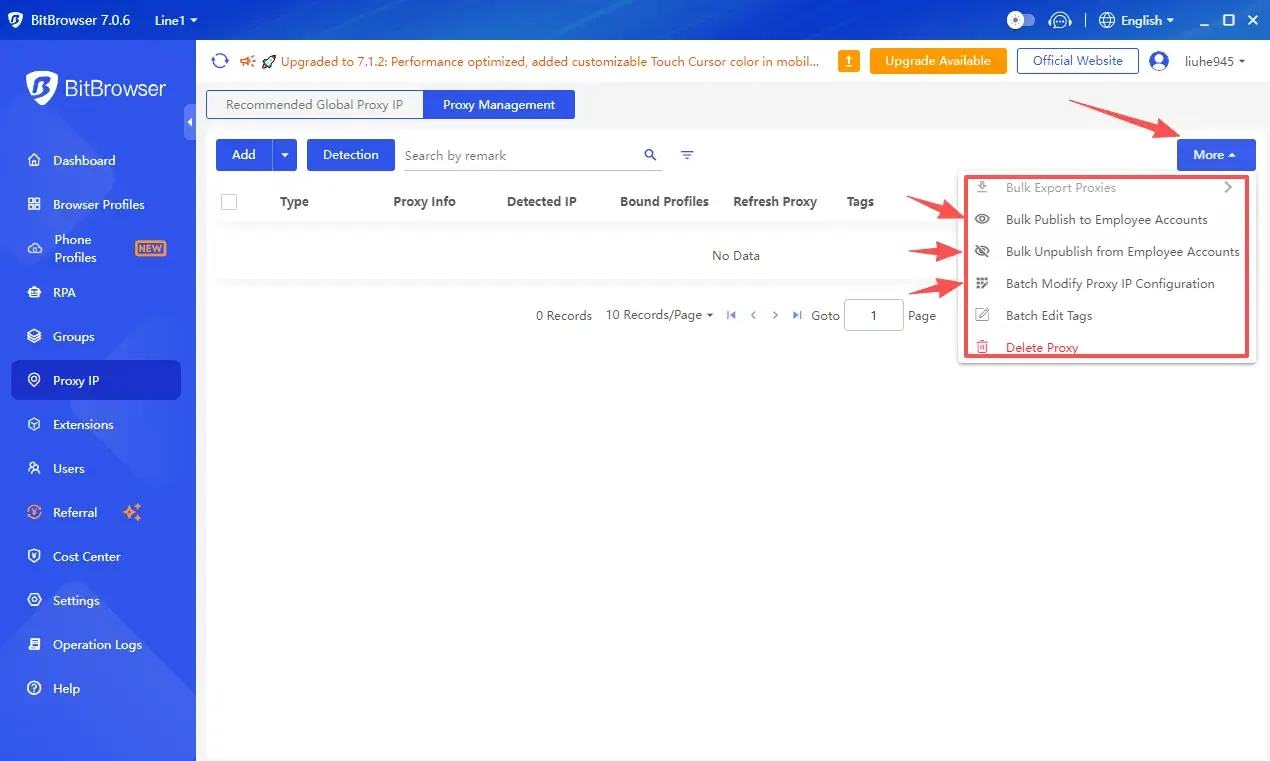
□ Open Bit Browser and locate “Proxy Management” or “IP Management”
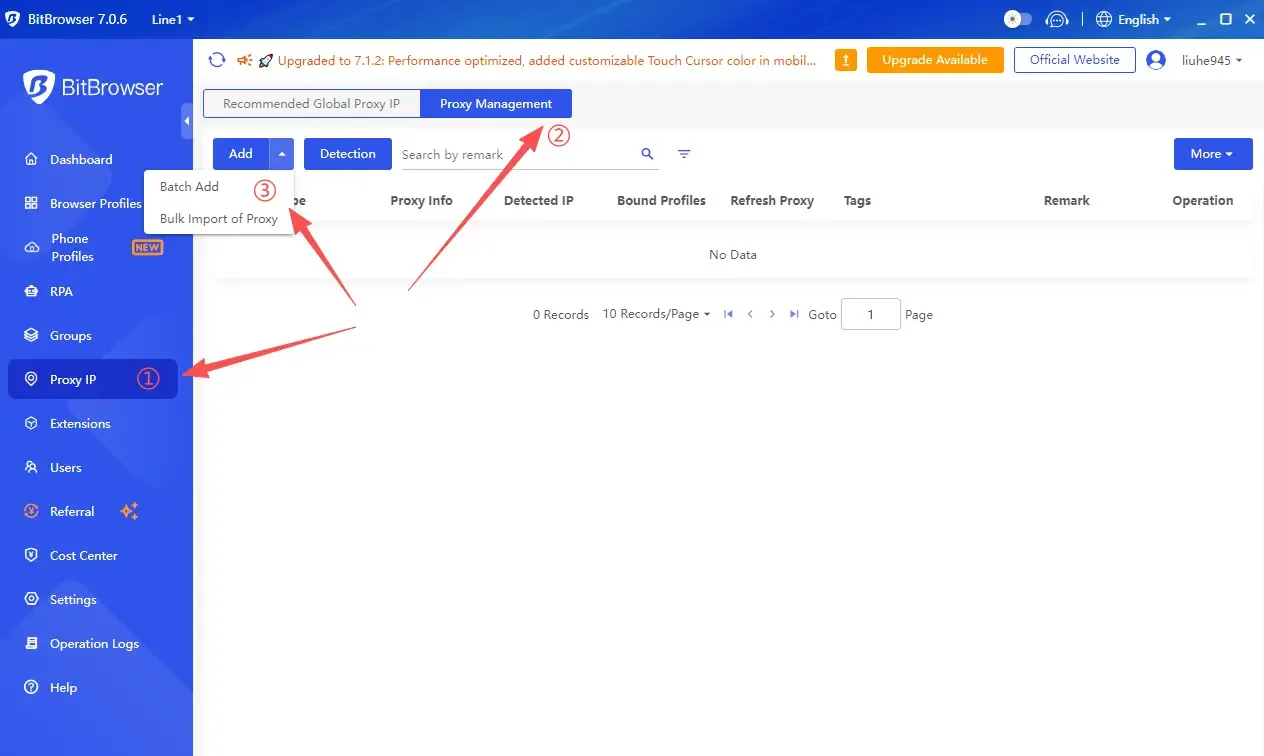
□ Click “Add Proxy” or “Batch Import”
□ The interface may vary slightly by version, but the general location is similar.
3. Batch import proxy IPs
After clicking “Batch Import,” there are usually two methods:
Method 1: Paste import – directly paste the prepared proxy list, one IP per line.
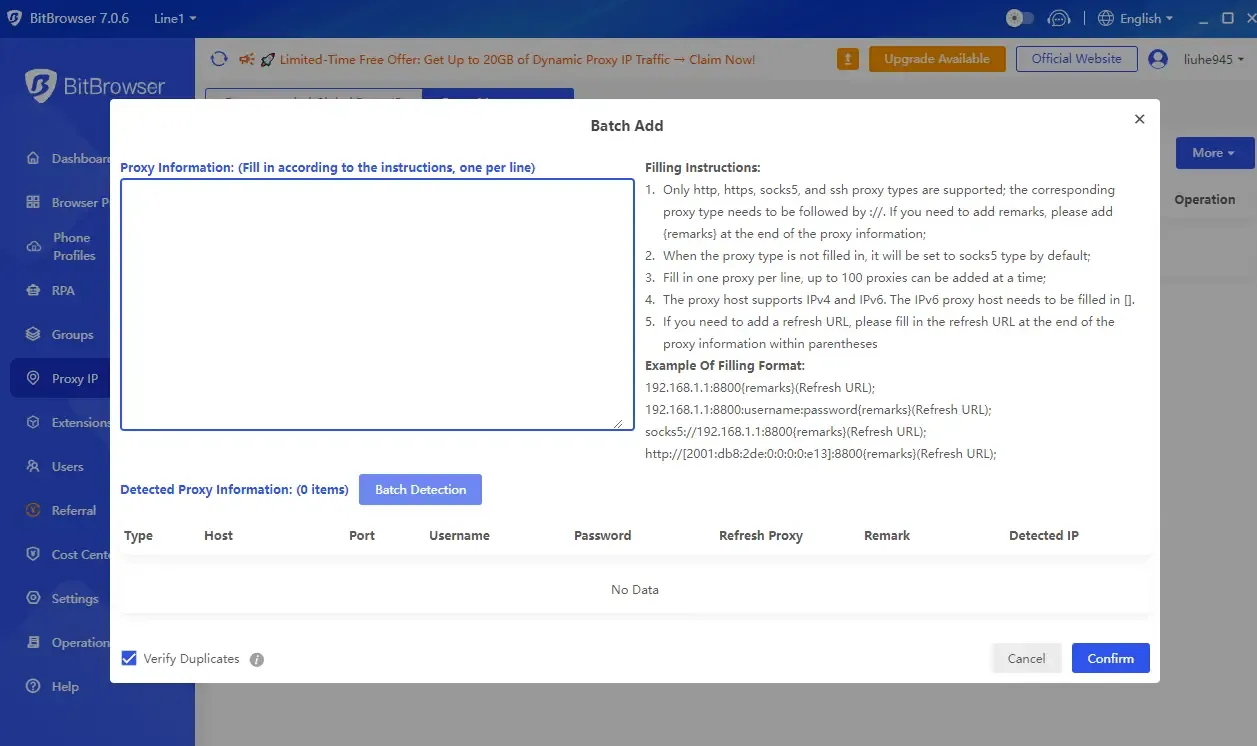
Method 2: File import – upload a TXT or CSV file, and the system will automatically recognize it.
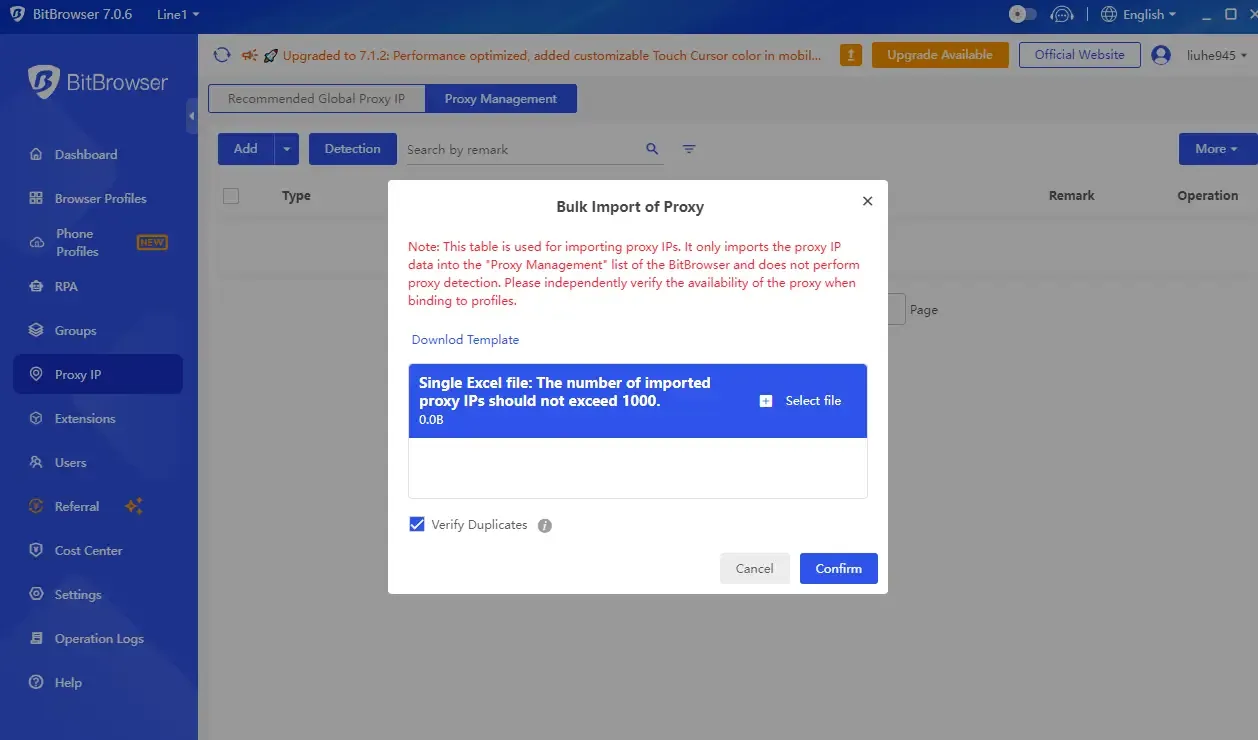
When importing, make sure to select the correct proxy type (HTTP / HTTPS / SOCKS5), verify username and password, and confirm encoding format to avoid errors.
4. Batch test proxy availability
After importing, don’t rush to use them. A crucial step is to test the proxies first.
Most browsers provide a “Test” button to check:
• Connectivity
• Whether the IP is real
• Whether the region matches
This step is very important as it helps filter out invalid IPs in advance and avoids login issues later.
5. Batch bind proxies to browser environments
Now comes the core step. In the environment management panel:
□ Select multiple browser environments
□ Choose “Batch Set Proxy”
□ Assign IPs from the imported proxy pool
Some browsers support “one-to-one automatic assignment,” meaning each environment is paired with a unique IP. This is key to achieving multi-environment switching.
4. Proxy types & batch import comparison table
| Type | Common Format | Use Case | Stability | Bulk Import Difficulty | Recommendation |
|---|---|---|---|---|---|
| HTTP Proxy | IP:Port | Basic account registration / light operations | Medium | Easy (supports paste / file import) | ⭐⭐⭐ |
| HTTPS Proxy | IP:Port | Cross-border e-commerce / social media login | High | Easy | ⭐⭐⭐⭐ |
| SOCKS5 Proxy | IP:Port:Username:Password | High anonymity / multi-platform account management | High | Medium (requires correct format) | ⭐⭐⭐⭐⭐ |
| Residential Proxy | Dynamic IP (API-based) | Anti-detection / long-term account nurturing | Very High | Complex (API / tool-based import) | ⭐⭐⭐⭐⭐ |
| Datacenter Proxy | Static IP Pool | Bulk testing / short-term tasks | Medium-Low | Easy | ⭐⭐⭐ |
5. How to achieve one-click multi-environment switching?
Many people think “multi-environment switching” is just changing IPs, but in reality it includes environment + IP + fingerprint parameters all switching together.
• One-click launch multiple environments
• Each environment runs independently
• Automatically load corresponding proxy IP
• Automatically apply different browser fingerprints
In practice: select multiple accounts in the environment list → click “Batch Launch” → the system will open multiple independent windows simultaneously.
Each window has different IP, fingerprint, and isolated cookies — just like operating multiple real devices at once.
6. Common issues with proxy import in fingerprint browsers
1. Why am I still flagged after importing proxies?
Possible reasons include low-quality proxy IPs, mismatched IP region vs account registration, or poor fingerprint isolation.
It is recommended to use high-quality residential IPs, maintain IP stability (avoid frequent changes), and combine with a fingerprint browser instead of using proxies alone.
2. What if the order is messed up after batch import?
Some tools automatically shuffle the order. You can fix this by numbering in advance (e.g., 1_US_IP, 2_UK_IP) or using structured CSV fields.
3. What if multi-environment switching lags?
If you launch too many environments at once (e.g., 20+), your system may not handle it.
Suggestions: launch in batches (5–10 at a time) / upgrade RAM (at least 16GB) / close unnecessary programs.
In summary
The value of batch importing proxy IPs and multi-environment switching lies in transforming tedious manual operations into standardized, repeatable workflows.
Fingerprint browsers handle “device environment masking,” while proxy IPs handle “network identity isolation.” Only by combining both can you achieve safe and stable multi-account operations.
In simple terms, fingerprint browsers + ToDetect tools are just the foundation. The real key is this — the cleaner your environment isolation, the safer your accounts will be.