Resources
 Feature overview

 Charles
 2026-10-16 10:55
When you're online, most people keep an eye on whether their public IP address changes — but pay far less attention to which servers are actually handling their DNS requests. Even when the public IP looks perfectly normal, DNS queries can still be sent to a resolver you never intended to use. That's what's usually called a DNS leak.
A DNS leak test isn't about counting how many IP addresses a page displays. The point is to confirm whether the resolver actually in use matches your network configuration. Below, we'll walk through how to test, how to read the results, and how to handle the problems that come up most often.

1. What is a DNS leak, and why should you check for one?
DNS (the Domain Name System) turns a website's domain name into the matching IP address. When you visit a site, your device usually has to complete a DNS lookup before it can connect to the target server.
If your device is meant to use a specific DNS service but the queries are actually handled by a different provider, your resolution path can end up somewhere you didn't intend.
That said, spotting a DNS server you don't recognise doesn't automatically mean there's a leak. Browser settings, router configuration and the way your ISP handles lookups can all affect the result. So judge the outcome against your current setup and how the test actually behaves — never off a single IP address.
DNS queries can reveal which domains you've visited, but that's not the same as exposing everything you browse along with your usernames and passwords. Checking your DNS configuration regularly is mainly about spotting an unexpected resolution path and keeping better control over your network privacy.
2. How do you test for DNS leaks?
Step 1: Write down your current DNS configuration
On Windows, open Command Prompt and run: ipconfig /all
Under the network adapter you're actually using, find the DNS server addresses and note them down. If your computer is connected over both Wi-Fi and Ethernet, make sure you're looking at the connection in use.
While you're there, check whether IPv6 is enabled and whether the DNS addresses are assigned automatically or entered by hand. Keep this information handy so you can compare it against the test results later.
Step 2: Run an online test
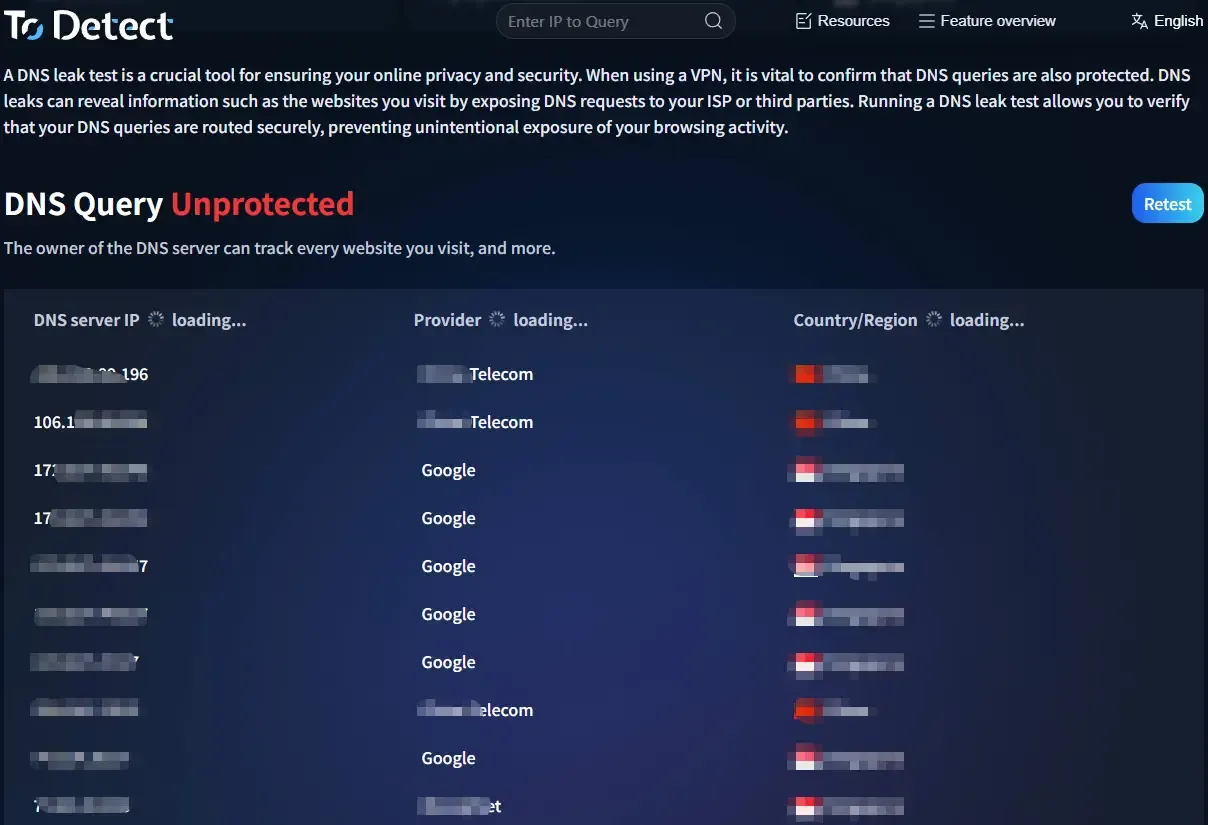
You can use the ToDetect DNS leak test, or any other online tool that reports DNS server information. Open the page, follow the prompt to start the test, then look at the DNS server IPs, the providers they belong to and where they're located.
Step 3: Make sense of the results
Judge the results against the configuration you expect — not simply by how many servers show up or where they're located.
| What the test shows | Likely cause | How to read it |
|---|---|---|
| Your local ISP's DNS | The system may be using its default DNS | Check whether that matches what you intended |
| A provider different from your manual settings | Browser, router or network resolution settings may differ | Look into the DNS configuration at each of those points |
| Several DNS server IPs | Multiple resolver nodes may be in use | Check the providers and how the addresses relate to each other |
| Server locations you didn't expect | Could relate to distributed nodes or network routing | Don't treat the location alone as a sign of trouble |
| Different results for IPv4 and IPv6 | The two protocols may use different resolution settings | Check the DNS configuration for each protocol separately |
Public DNS services may use distributed nodes or anycast, so a server's IP and its location won't always line up — that isn't necessarily a problem. What really matters is whether the resolver in use is the one you expect.
Step 4: Repeat the test and cross-check
Without changing your network connection, run the test two or three times in a row, then compare the results against a second detection site.
If the same unexpected DNS provider keeps showing up across several runs, dig into your system, browser and router settings. If the results differ between tools, remember that different tools may query in different ways — don't jump to the conclusion that you've got a leak.
3. Found a DNS leak? Common fixes
Once you spot something suspicious, work through the checks below in order. There's no need to change every network setting at once.
Check your system and browser DNS settings
Start by confirming that your system DNS addresses are correct. On Windows, open Settings > Network & Internet, select your current connection and check how DNS servers are assigned. Restore automatic assignment, or enter a trusted DNS address again, depending on what you actually need.
Next, check whether your browser is using its own secure DNS service. In Chrome, go to Settings > Privacy and security > Security > Use secure DNS; in Firefox, look for the DNS over HTTPS options in your privacy and security settings.
Cross-check IPv4, IPv6 and your router settings
If the results still don't match your expectations after adjusting the system and browser, check the DNS configuration for IPv4 and IPv6 separately. The two protocols using different servers isn't automatically a problem — what matters is whether they match what you need.
Then check the DNS and DHCP settings on your router. Your router may hand out DNS addresses to devices, and it may also forward queries to an upstream resolver, so the address your device shows isn't necessarily the server that ends up handling the query.
If you're not comfortable with these settings, note down the original configuration first and only change what you've confirmed to be a problem. Don't disable IPv6 or start tweaking other network parameters just to make a test page look consistent.
Flush the DNS cache and test again
On Windows, open Command Prompt and run ipconfig /flushdns. This clears the local DNS cache — it won't change your DNS server configuration, and it won't fix a DNS leak on its own.
Once you've made the necessary adjustments, run the DNS leak test again and check that the server IPs and providers match what you expect. For reference, see Microsoft's official documentation on the ipconfig command.
4. DNS leak test: frequently asked questions
The test shows several IPs — does that mean something is wrong?
Not necessarily. A single DNS provider may use several resolver nodes. Check the provider and the resolution path first, rather than fixating on the number of IPs.
The test shows my local ISP — what should I do?
If your system was already using your ISP's DNS, that's usually expected. If you've configured another resolver, check the DNS settings in your system, browser and router, then test again.
Can I test for DNS leaks on a phone?
Yes. Both Android phones and iPhones can open an online test page in the browser. Test Wi-Fi and mobile data separately, since different networks may use different resolution settings.
If the results look fine, is my network completely secure?
No. A DNS leak test mainly shows you which servers are handling your DNS queries, and it can't cover every network privacy concern. Keep an eye on system updates, connection security on the sites you visit, and the privacy policy of your DNS provider.
Summary
The heart of a DNS leak test is confirming that the resolver actually in use matches what you expect. Note down your system DNS settings, check the resolvers with an online tool such as ToDetect, then use the results to review your system, browser, IPv4, IPv6 and router configuration.
Several server IPs or unexpected locations don't on their own prove a leak. Weigh multiple test runs, the provider information and your actual configuration together to pinpoint the real issue. Once you've made your changes, test again to confirm the resolution path is the one you intended.