No Software, No Cost: A Complete Guide to Online DNS Leak Testing (with Screenshots)
If a DNS leak occurs, even if your IP address is hidden, the platforms you visit, your ISP, and even some third parties may still know which domains you are accessing. This undoubtedly affects your online privacy and user experience.
The key point is that most users never notice a DNS leak in their daily browsing—websites still load, videos still play—so it’s easy to keep ignoring this issue.
Today, we’ll walk you through a free DNS leak test, show you how to interpret the results, and explain what to do if a leak is found—so your online privacy truly has no loopholes.

1. What is a DNS leak and why do you need to test for it?
Sometimes, due to system settings, browser configuration, or proxy settings, DNS requests are sent directly to your local ISP’s DNS servers. This is called a DNS leak.
Once a DNS leak occurs, platforms may be able to infer your real geographical location; your ISP can still log your DNS queries; some streaming and gaming platforms may detect your actual network environment; and the privacy protection offered by proxy tools is weakened.
Therefore, whether you are a regular user or someone who frequently uses a proxy, it is advisable to run a DNS leak test periodically.
2. What are the advantages of online DNS leak detection ?
Compared to installing various detection software, online testing is much more convenient. The main advantages include:
• No need to download or install any program;
• Works on Windows, Mac, Linux, Android, iPhone, and other devices;
• The test runs entirely in your browser;
• Results are available within minutes;
• Free to use with no usage limits.
For the vast majority of users, online DNS leak detection is more than sufficient.
3. DNS leak test tutorial (using ToDetect as an example)
There are many testing platforms available online. ToDetect stands out with its clean interface, fast detection speed, and intuitive results—making it an excellent choice for those new to DNS leak testing.
Step 1: Open the ToDetect website
First, open the DNS test page on ToDetect in your browser. On the homepage, you will see a “DNS Leak Test” button.
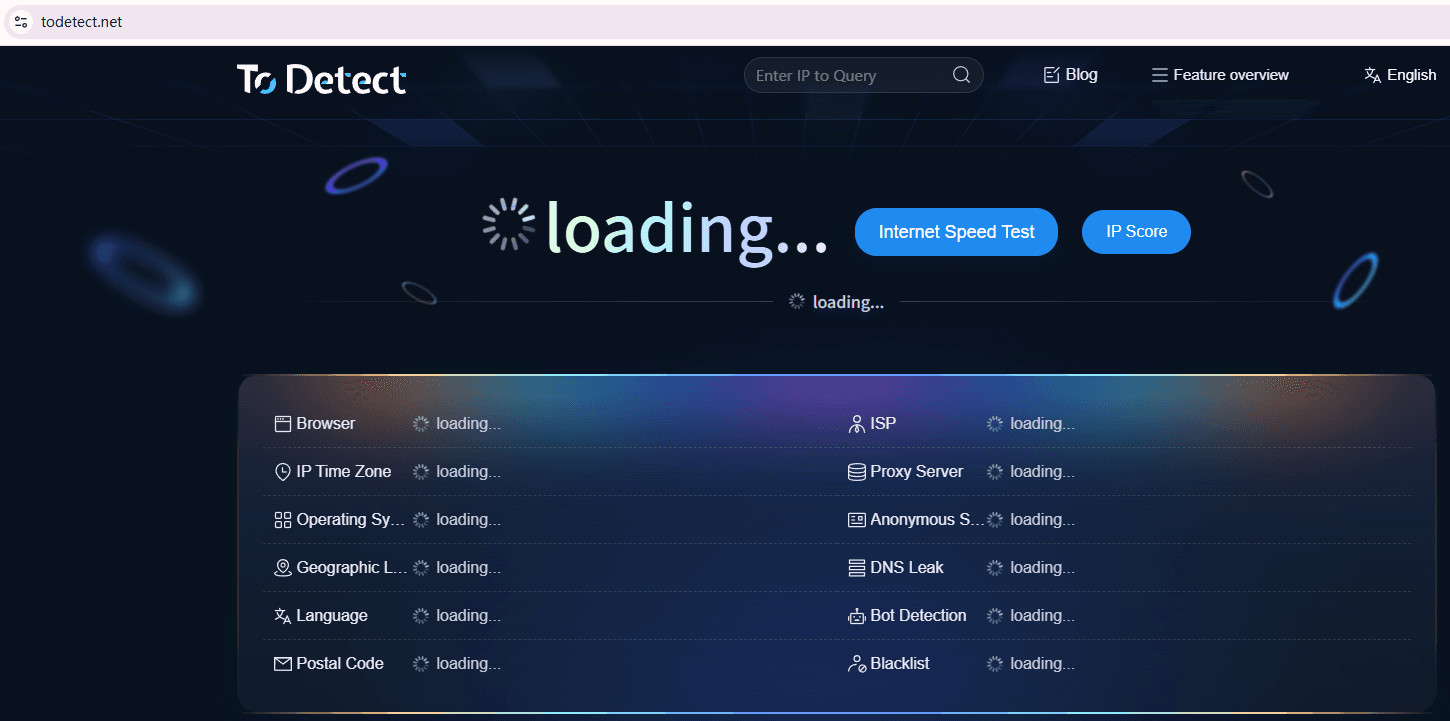
Step 2: Start the DNS leak test
Click the “Start Test” button. The system will automatically send requests to multiple DNS servers, and the test will complete in about 5–15 seconds. No configuration or account registration is required.
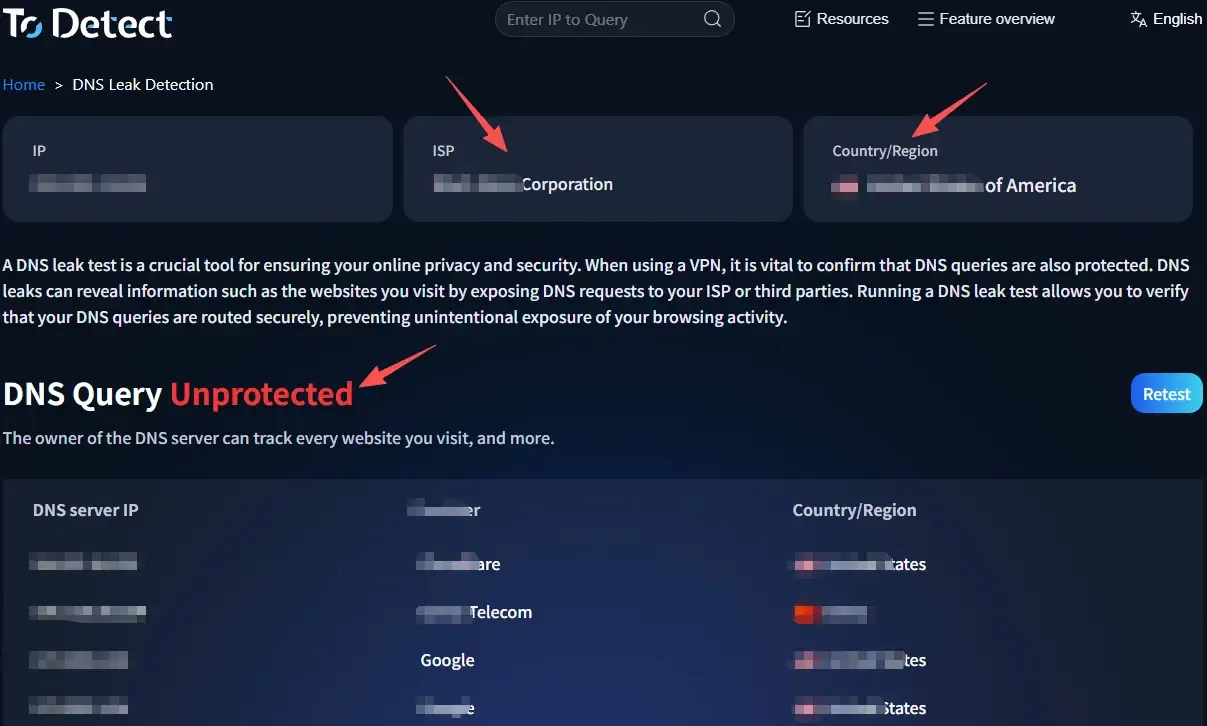
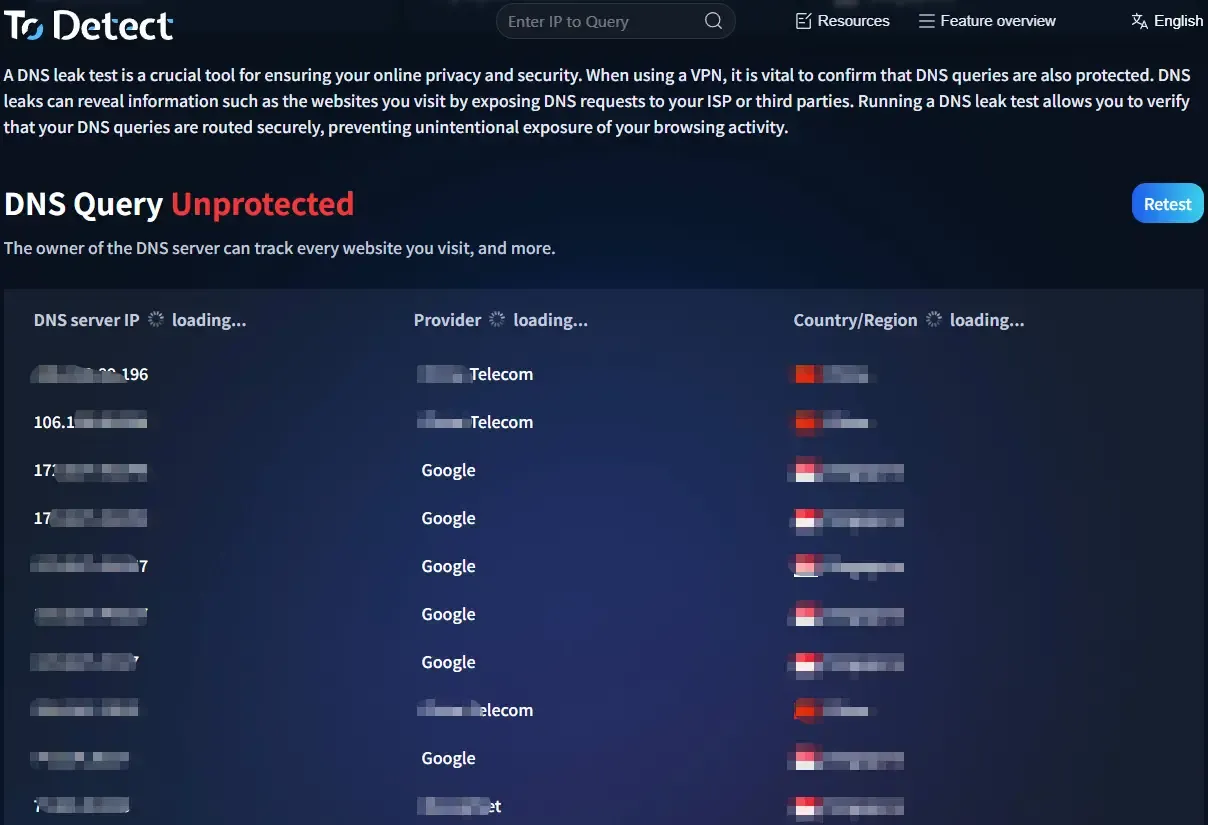
Step 3: Check the DNS server results
After the test completes, the DNS servers that handled your resolution requests will be displayed, including: DNS server IP addresses, the ISP they belong to, country or region, and the number of DNS servers detected.
If the detected DNS servers belong to the location of your current proxy node, it means your DNS requests are successfully routed through the proxy, and generally no DNS leak is present.
If the results show your local ISP (e.g., China Telecom, China Mobile, China Unicom) while you are using an overseas proxy, then a DNS leak is almost certainly occurring.
4. How to determine if DNS is leaking
Many first‑time testers are unsure how to read the results. In fact, the interpretation is straightforward. Here are a few common scenarios:
Scenario 1: DNS servers match the proxy location
For example, Cloudflare, Google DNS, proxy provider DNS, or DNS servers located in the proxy’s country. This is generally normal.
Scenario 2: Local ISP DNS servers appear
For instance, China Telecom DNS, China Unicom DNS, China Mobile DNS, or your local broadband ISP DNS. If your proxy is connected and these still show up, a DNS leak is happening.
Scenario 3: Multiple DNS servers from different regions
If the results show DNS servers from multiple countries and multiple ISPs simultaneously, you should further inspect your browser, system network settings, and proxy client configuration.
5. What to do about a DNS leak – common solutions
If a DNS leak is detected, don’t worry—in most cases it can be fixed. Common approaches include:
First, enable the proxy’s built‑in DNS leak protection.
Most mainstream proxy clients offer a “DNS Leak Protection” or “Prevent DNS Leak” option—just turn it on.
Second, change your system DNS.
You can set your DNS to a public resolver such as Cloudflare (1.1.1.1) or Google Public DNS (8.8.8.8) to reduce your ISP’s involvement in DNS resolution.
Third, enable Secure DNS in your browser.
Browsers like Chrome, Edge, and Firefox already support Secure DNS (DNS over HTTPS). Enabling this further enhances the security of your DNS requests.
Fourth, re‑run the DNS leak test.
After making changes, run the DNS leak test again with ToDetect to confirm the issue is resolved—don’t just change settings without verifying the outcome.
6. DNS leak detection – FAQ
Q1: If the test shows multiple DNS servers, does that definitely mean a DNS leak?
Not necessarily. If all the detected DNS servers belong to the proxy provider, public DNS resolvers, or proxy nodes in the same region, it’s usually normal. Only when you still see your local ISP DNS (e.g., China Telecom, Unicom, Mobile) after the proxy is enabled can you be fairly certain a leak exists.
Q2: If the DNS leak test is clear, does that mean my network is completely safe?
No. The DNS leak test only verifies whether your DNS requests are exposed; it doesn’t guarantee that your IP address, WebRTC, IPv6, or other information isn’t leaking. For comprehensive privacy protection, combine this with IP leak tests, WebRTC checks, and other assessments.
Q3: Why do I get different results each time I run the test?
This is quite common. Many public DNS resolvers and proxy providers use load‑balancing, so different DNS servers may be assigned each time. Slight variations in IP and region are normal. As long as your local ISP DNS doesn’t appear, there’s generally no cause for concern.
Q4: How often should I run a DNS leak test?
It’s recommended to rerun the test after you change proxy nodes, switch networks, modify DNS settings, update your system, or update your proxy client. Additionally, if you notice unusual website geolocation, streaming unlock failures, or other network anomalies, run a DNS leak test promptly to confirm your DNS resolution is working properly.
Summary
Although DNS leaks aren’t as obvious as IP leaks, they can still undermine your privacy and proxy effectiveness. Fortunately, there are now many free online testing tools—just open your browser and you can complete a DNS leak test in minutes.
With ToDetect’s free DNS leak test, there’s no need to install any software or register an account. In just a few minutes, you’ll know whether your DNS requests are truly going through your proxy, allowing you to detect and fix potential privacy risks early—so your everyday browsing remains safer and more secure.