Resources
 Feature overview

 Charles
 2026-09-24 10:16
Many people regularly keep an eye on whether their public IP address has changed, but rarely pay attention to DNS. In fact, even if your egress IP appears completely normal, your real network environment can still be exposed if DNS resolution is still routed through your local network.
Especially on commonly used browsers like Chrome and Edge, even if you have already turned on "Use Secure DNS", it does not guarantee that all resolution requests will follow your expected routing path.
Therefore, to check if your browser has a DNS leak, you cannot only look at a single toggle switch, nor can you only check the geographic location of your DNS. In this guide, we will walk you through simple methods to verify the DNS status on Chrome and Edge, and help you distinguish real anomalies from common false positives.

1. First, understand: What exactly counts as a DNS Leak?
When testing DNS, many people directly compare the geographic location of their DNS server with the location of their egress IP. If the two countries do not match, they immediately assume a DNS leak has occurred.
In reality, a leak only happens when you are using a proxy network expecting all related requests to be processed through your designated route, but your DNS queries are still being sent to your local broadband ISP, your company's default DNS server, or any other resolver that should not be handling your requests.
This means: A mismatch between your DNS location and your egress IP location is not automatically a DNS leak. Geographic inconsistency is only an anomaly clue, and you need to make a full judgment by combining the DNS service provider, your network route, and your actual usage environment.
2. Check DNS Settings Directly in Chrome / Edge
How do you check for browser DNS leaks? You can start with the native settings built directly into your browser.
Chrome DNS Settings
In the Chrome address bar, type: chrome://settings/security, then find the "Use Secure DNS" section. Here you can verify whether Chrome has encrypted DNS enabled.
If you want to clear the DNS cache stored by the browser, you can also navigate to: chrome://net-internals/#dns, then click "Clear Host Cache".
Edge DNS Settings
Edge follows a similar logic. You can go to: edge://settings/privacy to view your Secure DNS configuration. For the DNS cache page, you can visit: edge://net-internals/#dns
One important note: These pages only show you your browser configuration and let you clear cached data. They cannot directly tell you exactly which upstream DNS resolver you are actively using right now.
3. Why Do Anomalies Still Appear Even When "Secure DNS" Is Turned On?
This is a detail most users easily overlook. The Secure DNS feature in Chrome and Edge only applies to DNS queries initiated by the browser itself. It does not mean that your entire Windows or macOS system will uniformly use encrypted DNS for all requests.
Other software, background processes, and even some standalone network applications on your computer may still perform resolution according to your system's default DNS configuration. This is the key difference between browser-level DNS and system-level DNS.
Additionally, in automatic Secure DNS mode, if encrypted DNS fails to connect properly, the browser may fall back to unencrypted standard resolution in some scenarios. This means that seeing "Use Secure DNS" marked as enabled does not guarantee that every single DNS request from your entire computer will pass through an encrypted tunnel.
4. Further Inspect DNS Using Command Line Tools
If you want to confirm exactly which resolver your current network is using for resolution, you can run additional tests through the command line.
Check DNS on Windows
• Open CMD on Windows and run: nslookup -type=TXT whoami.ds.akahelp.net
• This type of query helps you identify information related to your recursive DNS resolution. If the returned content looks complex, do not mistake every IP address listed for a DNS server — you will need to judge based on the specific fields returned.
• To view the current DNS configuration on your Windows network adapter, you can use: ipconfig /all, or enter this command in PowerShell: Get-DnsClientServerAddress
• The Resolve-DnsName cmdlet is better suited for executing DNS queries and testing if your current system resolution works correctly, rather than being used exclusively to view your DNS configuration.
Check DNS on macOS / Linux
macOS and Linux users can run this command: dig +short TXT whoami.ds.akahelp.net
If you want to test resolution against a specific public DNS server, you can use: dig @1.1.1.1 example.com. This lets you directly compare the resolution differences between your system default DNS and the designated public DNS.
5. How Should You Interpret Your DNS Test Results?
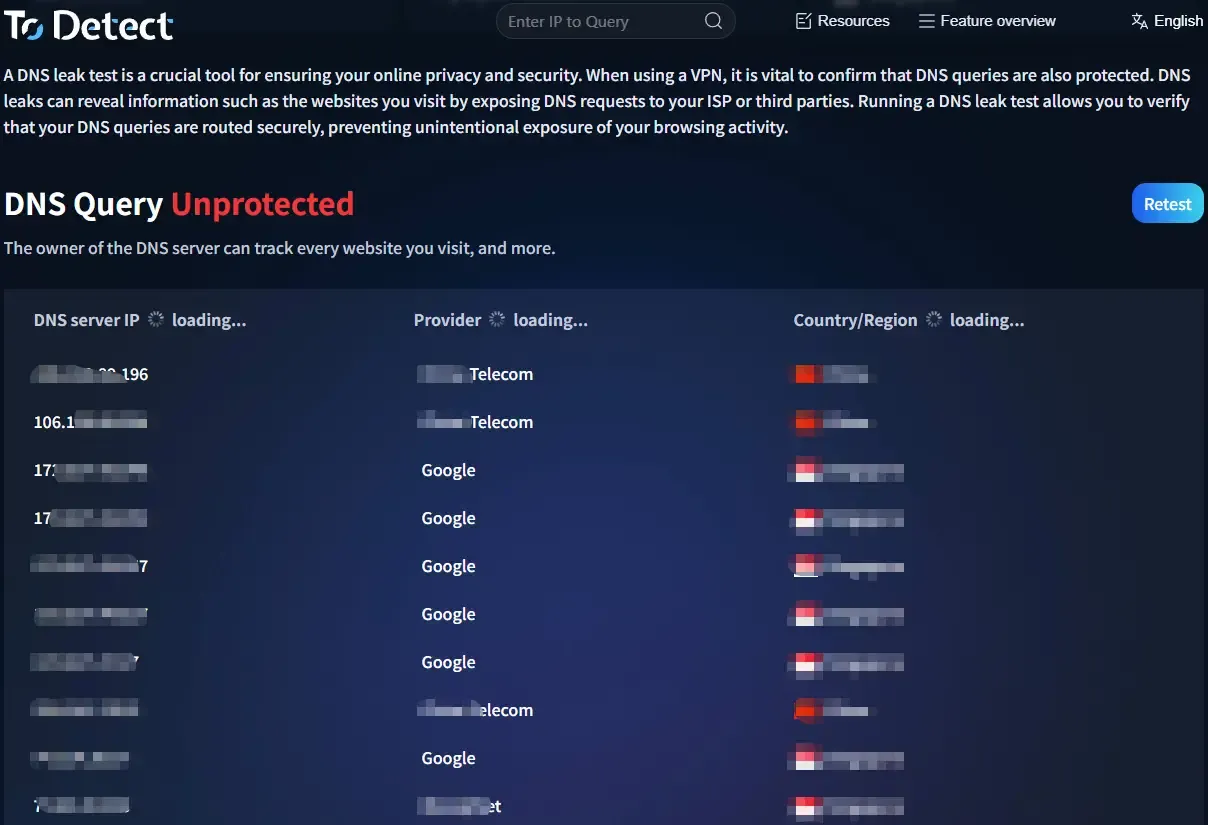
To judge if your DNS has real anomalies, you should not only check the country and region. A more reliable method is to compare all of the following pieces of information together:
• Your egress IP, the ISP that owns the IP, the country/region location, the DNS Resolver, your DNS service provider, and your IPv4 / IPv6 network status.
• For example, if you are connected to an overseas proxy route, but your test results consistently show DNS servers belonging to your local broadband ISP, this is a situation that requires immediate focused investigation.
• However, if the results show public DNS providers like Cloudflare or Google, even if the geographic location of the DNS node does not perfectly match your egress IP, you cannot immediately conclude that a leak has occurred.
We recommend running the test multiple times consecutively, instead of drawing a final conclusion based on a single result.
6. How Do You Fix Issues Found in DNS Leak Detection?
If you confirm that your DNS queries are indeed being routed through unintended paths, you can troubleshoot step by step at several different levels.
Windows / macOS DNS Configuration
On Windows 11, you can check your network adapter DNS settings, and configure encrypted DNS based on your specific network environment. On macOS, you can uniformly manage DNS through the system network settings or custom configuration profiles.
Router DNS Settings
If you want every device on your home or office network to use your designated DNS server, you can configure this at the router level. At the same time, you can keep Secure DNS enabled in your browser as an extra layer of encrypted protection for browser traffic.
IPv6 DNS Troubleshooting
When using a proxy network, do not overlook IPv6. If your proxy only handles IPv4 traffic while IPv6 connections still go directly to your local network, this will cause inconsistencies in your IP, DNS, and overall network environment.
Remember this one simple core principle:
To judge a DNS leak, you do not look at whether your DNS and IP are located in the same country. You look at whether your DNS queries are being sent to resolvers that you never intended to use.
By checking your egress IP, DNS service provider, system DNS settings, and both IPv4 and IPv6 configurations together, you will get a far more reliable result than judging based on a single DNS address alone.